Gipfeli Recipe! This Swiss delight has captured hearts and taste buds for generations. Known for its light, flaky texture and irresistible nutty filling, this pastry is a staple of Swiss breakfasts, snack time, and special occasions. Whether you’re a seasoned baker or a curious beginner, this guide will take you step-by-step through everything you need to know about making Gipfeli at home.
From its rich history to ingredient preparation, shaping techniques, and creative variations, we’ll cover it all. By the end, you’ll not only know how to craft perfect Gipfeli but also understand how to troubleshoot common baking issues, store them properly, and serve them like a pro.
So, let’s dive into the wonderful world of Gipfeli with this ultimate guide!
Understanding Gipfeli: The Iconic Swiss Pastry
What Is Gipfeli?
Gipfeli is Switzerland’s answer to the croissant, but don’t mistake it for just another buttery crescent! While both pastries share a similar shape, Gipfeli has a unique identity, particularly when it comes to texture and filling. It’s often made with either a yeasted dough or puff pastry and filled with sweet or savory fillings, such as nuts, chocolate, or cheese.
Unlike its French counterpart, Gipfeli typically leans less buttery, making it lighter and less rich while still delivering an indulgent experience.
Gipfeli vs. Croissant
You might wonder, “What makes a Gipfeli different from a croissant?” Well, the distinction lies in the dough and the fillings. While croissants rely heavily on layers of butter folded into the dough (hello, buttery heaven!), Gipfeli dough can vary from puff pastry to a softer, yeast-based dough. Fillings like almonds, hazelnuts, and fruit jams also set Gipfeli apart, giving them a truly Swiss twist.
Why Gipfeli Is Beloved
The love for Gipfeli transcends borders. In Switzerland, it’s common to enjoy this pastry with a hot cup of coffee or tea during breakfast or as a snack after a long hike. Its versatility, paired with its flaky, nutty goodness, has made it a beloved treat for generations.
Whether you’re a Swiss native or discovering this gem for the first time, Gipfeli is a pastry that promises to charm you with every bite.
Key Ingredients for the Perfect Gipfeli
Making Gipfeli at home is an exciting culinary journey, and it all starts with the right ingredients. With just a handful of kitchen staples and a few special touches, you’ll have everything you need to create a mouthwatering Gipfeli recipe that’s both authentic and delicious.
Core Ingredients
To craft perfect Gipfeli, you’ll need a mix of dry and wet ingredients. These basics form the foundation of your pastry:
- Flour: 3 ½ cups (450g) of all-purpose flour for structure.
- Yeast: 2 ¼ teaspoons (1 packet) of active dry yeast to help the dough rise.
- Milk: 1 cup (240ml) of warm milk, ensuring a soft texture.
- Butter: 6 tablespoons (85g) of unsalted butter, softened for richness.
- Sugar: ¼ cup (50g) of granulated sugar to add a touch of sweetness.
- Salt: 1 teaspoon to balance the flavors.
For the glaze and shine:
- Egg: 1 egg, whisked for brushing the Gipfeli.
- Apricot Jam: 2 tablespoons, thinned with water, to add a sticky glaze if desired.
Optional Enhancements
To elevate your Gipfeli, consider adding some creative ingredients. These are not essential but can add a unique twist:
- Cinnamon: ½ teaspoon for a warm, aromatic flavor.
- Vanilla Extract: 1 teaspoon for an extra layer of sweetness.
- Nuts: Finely chopped almonds or hazelnuts for sprinkling on top.
Each ingredient plays an important role in achieving that perfect balance of flavor and texture. By using high-quality staples, your Gipfeli recipe will truly shine.
Tools and Preparation Tips
Now that you have your ingredients ready, it’s time to prepare for the baking process. Setting up your kitchen properly ensures a smooth experience and the best results.
Essential Tools
To create Gipfeli like a pro, you’ll need a few essential tools. These will make your life easier and help ensure consistent results:
- Mixing Bowls: At least two large bowls for combining dough ingredients and preparing fillings.
- Measuring Cups and Spoons: For precise ingredient proportions.
- Rolling Pin: To roll out the dough evenly.
- Baking Sheet: Lined with parchment paper for easy cleanup.
- Pastry Brush: For applying the egg wash or glaze.
Preparation Tips
- Measure Accurately: Precision is key in baking. Use a digital kitchen scale for exact measurements, especially for the flour and butter.
- Warm Your Ingredients: Ensure the milk is warm (not hot) and the butter is softened. Cold ingredients can hinder the yeast’s activity.
- Create the Perfect Environment: Dough rises best in a warm, draft-free space. If your kitchen is cold, preheat your oven to the lowest temperature for a few minutes, turn it off, and place your dough inside to rise.
By organizing your tools and following these tips, you’ll set the stage for a successful Gipfeli recipe. Ready to move on to crafting the dough? Let’s roll!
How to Make Gipfeli Dough
The foundation of any great Gipfeli recipe is the dough. It’s the canvas that holds the delicate layers of flavor and texture, and making it from scratch ensures a fresher, more satisfying pastry. Here’s a straightforward way to prepare it.
Preparing Yeasted Dough
- Activate the Yeast:
Begin by warming 1 cup (240ml) of milk to about 110°F (43°C). Stir in 2 ¼ teaspoons (1 packet) of active dry yeast and 1 teaspoon of sugar. Let the mixture sit for 5–10 minutes until it becomes foamy. - Combine Dry Ingredients:
In a large mixing bowl, whisk together:- 3 ½ cups (450g) all-purpose flour
- ¼ cup (50g) granulated sugar
- 1 teaspoon salt
- Add Wet Ingredients:
Make a well in the center of the dry ingredients and pour in the yeast mixture. Add 6 tablespoons (85g) of softened butter and mix until a soft dough forms. - Knead the Dough:
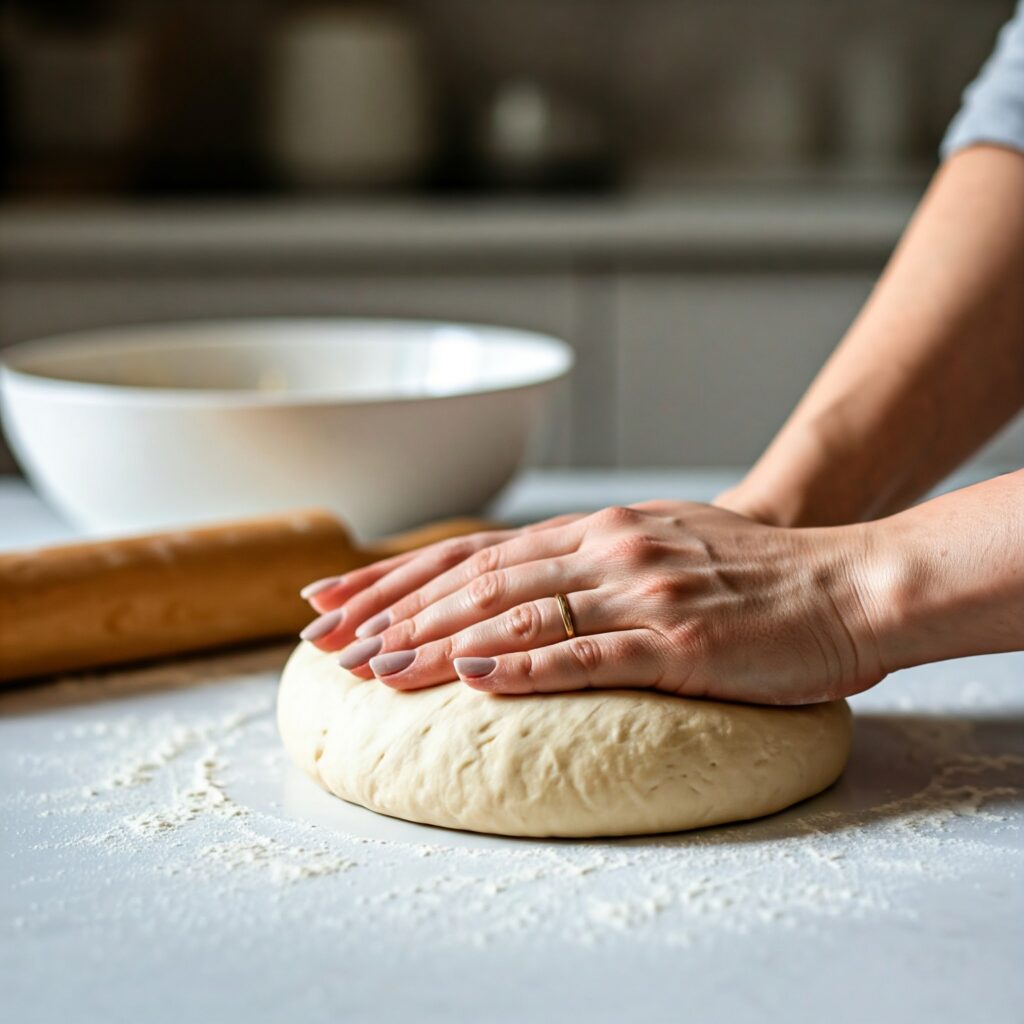
On a floured surface, knead the dough for 8–10 minutes until it becomes smooth and elastic. Alternatively, use a stand mixer with a dough hook for 5–6 minutes. - First Rise:
Place the dough in a greased bowl, cover it with a damp cloth, and let it rise in a warm place for about 1 hour or until it doubles in size.

Letting the Dough Rise
Patience is key here. Proper rising allows the yeast to develop flavor and structure, resulting in that signature airy texture. If your kitchen is chilly, set the bowl near a warm oven or use a proofing drawer.
Crafting the Gipfeli Filling
Now that your dough is prepped and ready, it’s time to turn your attention to the heart of the Gipfeli recipe—the filling. Whether you choose a classic nut-based option or a creative twist, the filling brings your pastries to life.
Toasting and Preparing Nuts
- Select Your Nuts:
Traditional Gipfeli often use almonds or hazelnuts. For this recipe, use:- 1 cup (120g) of almonds or hazelnuts, finely ground.
- Toast the Nuts:
Spread the nuts on a baking sheet and toast them at 350°F (175°C) for 8–10 minutes. Toasting enhances their flavor and gives the filling a deeper, nuttier taste. - Combine Filling Ingredients:
In a mixing bowl, combine:- Toasted, ground nuts
- ¼ cup (50g) granulated sugar
- ½ teaspoon cinnamon for warmth
- 2–3 tablespoons of water or apple juice to form a thick paste.
Mixing the Filling
Adjust the texture by adding liquid gradually. The filling should be thick enough to hold its shape but spreadable. Avoid making it too wet, as it can leak during baking.
Shaping and Assembling Gipfeli
Shaping the dough is where the magic happens in any Gipfeli recipe. This step transforms your carefully prepared dough into the familiar crescent shapes we all know and love. While it may seem tricky at first, following these steps will make the process simple and enjoyable.
Rolling Out the Dough
- Divide the Dough:
After the dough has risen, gently punch it down to release the air. Divide it into two equal portions to make it easier to handle. - Create a Flat Surface:
Lightly flour your work surface and rolling pin. Roll each portion into a large rectangle, approximately 12 x 16 inches, ensuring an even thickness of about ¼ inch. - Cut into Triangles:
Using a sharp knife or a pizza cutter, slice the dough into small triangles. Aim for each triangle to be about 4–5 inches wide at the base and tapering to a point.
Adding the Filling
- Spread the Filling:
Place about 1 tablespoon of the prepared nut filling near the base of each triangle. Avoid overfilling to prevent leaks during baking. - Roll into Crescents:
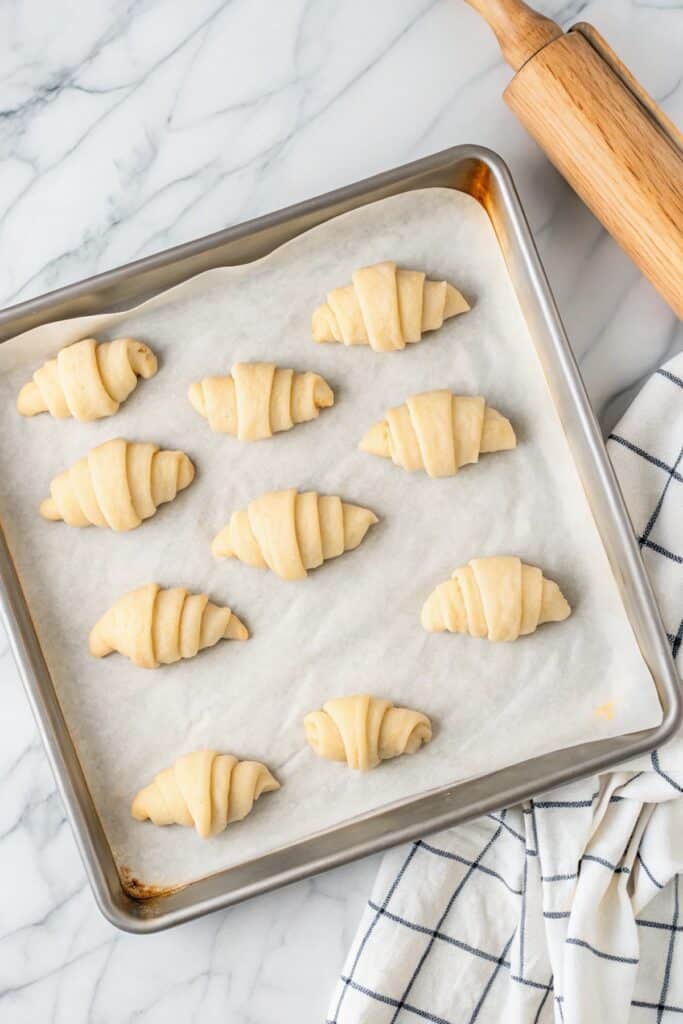
Starting at the wide base of the triangle, gently roll the dough toward the point, tucking the edges slightly to create a crescent shape. Place each rolled Gipfeli on a parchment-lined baking sheet, leaving about 2 inches of space between each one. - Brush with Egg Wash:
Whisk one egg with a splash of milk and brush it over the Gipfeli. This step gives the pastry a golden, shiny finish.

Baking Gipfeli to Perfection
Now that your Gipfeli are shaped and ready, it’s time to bake them to a perfect golden brown. This is the final stretch in your Gipfeli recipe, so let’s make sure they turn out just right.
Preheating and Baking Tips
- Preheat the Oven:
Set your oven to 375°F (190°C) and allow it to fully preheat. A hot oven ensures even baking and helps the Gipfeli rise properly. - Bake Until Golden:
Place the baking sheets on the center rack of the oven. Bake for 18–20 minutes, or until the Gipfeli are puffed and lightly golden. Keep an eye on them during the last few minutes to prevent over-browning. - Cool the Pastries:
Remove the baked Gipfeli from the oven and transfer them to a wire rack. Let them cool for at least 10 minutes before adding any finishing touches.
Glazing and Finishing Touches
- Prepare the Glaze:
In a small bowl, mix 2 tablespoons of apricot jam with 1 teaspoon of hot water. Brush this glaze over the Gipfeli while they are still slightly warm for a glossy finish. - Optional Toppings:
For added flair, sprinkle a few finely chopped nuts or a dusting of powdered sugar over the top.
By following these steps, your freshly baked Gipfeli will look just as good as they taste. Whether you serve them warm or save them for later, these pastries are sure to impress anyone lucky enough to try them.
Creative Variations of Gipfeli
One of the joys of mastering a Gipfeli recipe is how versatile it can be. Once you’ve nailed the basics, you can experiment with a variety of fillings and flavors to make your Gipfeli uniquely yours. From sweet to savory, the possibilities are endless.
Sweet Variations
- Chocolate Delight:
Replace the nut filling with a generous piece of chocolate or chocolate spread like Nutella. As the Gipfeli bakes, the chocolate melts into a gooey, irresistible center. - Berry Bliss:
Add a dollop of fruit preserves, such as raspberry or apricot jam, to the base of the triangle before rolling. This adds a tart-sweet surprise to each bite. - Cinnamon Sugar Swirl:
Sprinkle the dough with a mix of cinnamon and sugar before adding the filling. This creates a warm, spiced twist on the classic.
Savory Twists
- Cheese and Herbs:
For a savory option, fill your Gipfeli with grated cheese (like Gruyère) and a sprinkle of fresh herbs such as rosemary or thyme. - Spinach and Feta:
Add a small amount of sautéed spinach and crumbled feta cheese for a Mediterranean-inspired take. - Mushroom and Garlic:
Use a mix of sautéed mushrooms, garlic, and a touch of cream cheese for a hearty filling that’s perfect for brunch.
Regional Twists
Explore flavors inspired by different cuisines. For example, add a dash of cardamom or saffron for a Middle Eastern touch, or use shredded coconut and jaggery for a South Asian flair. These variations ensure your Gipfeli recipe stays exciting and fresh every time you bake.
Storing, Reheating, and Serving Ideas
Proper storage and reheating techniques are essential to keep your Gipfeli as delicious as when they were freshly baked. Whether you plan to serve them immediately or enjoy them later, these tips will help you make the most of your pastries.
Proper Storage Tips
- Room Temperature:
If you plan to eat your Gipfeli within a day or two, store them in an airtight container at room temperature. This keeps them from drying out. - Refrigeration:
For longer storage, place the Gipfeli in a sealed container or zip-top bag and refrigerate. They’ll stay fresh for up to five days, but let them return to room temperature before serving. - Freezing for Freshness:
Gipfeli freeze beautifully. Place them in a freezer-safe bag or container, separating layers with parchment paper to prevent sticking. They can be stored for up to three months.
Reheating Techniques
- Oven Method:
Preheat your oven to 350°F (175°C). Place the Gipfeli on a baking sheet and warm for 5–7 minutes. This restores their crisp exterior while keeping the filling gooey. - Microwave Method:
If you’re in a hurry, microwave the Gipfeli on medium power for 20–30 seconds. While they won’t be as crispy, they’ll still taste delicious.
Serving Suggestions
- Serve your Gipfeli warm with a dusting of powdered sugar for an elegant touch.
- Pair sweet variations with a steaming cup of coffee or hot chocolate for a cozy treat.
- Enjoy savory options with a side of fresh salad or soup for a satisfying meal.
By following these tips, your Gipfeli recipe will not only impress your taste buds but also stay fresh and flavorful for days to come.
Troubleshooting Common Gipfeli Challenges
Even the best bakers encounter a few hiccups while making a Gipfeli recipe. Fortunately, most issues can be fixed with simple adjustments. Let’s address some common challenges and how to overcome them.
Dough Troubleshooting
- Sticky Dough:
If your dough is too sticky to handle, don’t panic. Lightly flour your hands and work surface, but be careful not to add too much flour, as this can make the dough tough. Sticky dough often improves after kneading or chilling for a short time. - Dough Isn’t Rising:
When the dough fails to rise, the yeast may be the culprit. Ensure your yeast is fresh and that your milk wasn’t too hot (above 115°F can kill the yeast). Try placing the dough in a warm, draft-free spot like an oven with the light on. - Tough or Dry Dough:
If the dough feels stiff or dry, it might need more liquid. Add a teaspoon of warm milk at a time and knead until the dough becomes smooth and pliable.
Baking Issues
- Leaking Filling:
To prevent leaks, avoid overfilling the triangles. Make sure the dough is sealed tightly around the filling and bake on parchment paper to catch any spills. - Uneven Baking:
If some Gipfeli bake faster than others, it could be due to uneven dough thickness. Roll the dough evenly and rotate the baking sheet halfway through for even browning. - Burned Tops or Pale Pastries:
Burned tops suggest the oven is too hot, while pale pastries may need an egg wash. Adjust your oven temperature slightly and brush Gipfeli generously with the egg mixture before baking.
Addressing these challenges ensures your Gipfeli recipe produces bakery-quality pastries every time.
FAQs About Gipfeli Recipes
If you’ve ever wondered about customizing or improving your Gipfeli recipe, you’re not alone. Here are answers to some frequently asked questions to help you bake with confidence.
Can I Freeze Gipfeli?
Absolutely! Freezing Gipfeli is a fantastic way to enjoy fresh pastries later. Freeze unbaked Gipfeli after shaping or baked Gipfeli after cooling. To bake frozen Gipfeli, let them thaw slightly and bake as usual. For frozen baked Gipfeli, reheat in the oven for a crisp finish.
What Are the Best Fillings for Beginners?
For first-time bakers, stick to simple fillings like chocolate chips or fruit preserves. These are less likely to leak and are easy to work with. Once you’re comfortable, experiment with nut pastes or savory ingredients.
Can I Use Store-Bought Dough?
Yes, store-bought puff pastry can save time and works wonderfully for Gipfeli recipes. However, homemade yeasted dough offers a softer texture and more authentic flavor, so try both to find your favorite.
How Do I Make Gluten-Free or Vegan Gipfeli?
For gluten-free Gipfeli, substitute all-purpose flour with a high-quality gluten-free baking mix and follow the same steps. For vegan versions, replace butter with plant-based margarine and use a flaxseed “egg” wash (1 tablespoon ground flaxseed + 2 tablespoons water).
Try This Delicious Gipfeli Recipe Today!
With this step-by-step Gipfeli recipe, you’re all set to bring a taste of Switzerland to your kitchen. From crafting the dough to experimenting with creative fillings, Gipfeli offers endless possibilities for sweet and savory treats. Whether you’re hosting brunch or simply indulging in a cozy snack, these crescent-shaped delights are sure to impress.
For more baking inspiration, check out how to toast nuts perfectly, tips for working with yeast dough, and the art of glazing pastries. These resources will help you refine your skills and take your pastries to the next level.
Now it’s time to roll, bake, and savor the results. Don’t forget to share your creations and enjoy the wonderful flavors of homemade Gipfeli!


1 thought on “Mastering the Art of Gipfeli: A Complete Recipe and Guide”